Table of Contents
For GIS users who haven’t heard of PostGIS:
PostGIS is a spatial database extender for PostgreSQL object-relational database. It adds support for geographic objects allowing location queries to be run in SQL.
In this tutorial post we’ll cover how to install and run a PostGIS database on Windows using Docker, a popular containerization platform. We’ll then connect to the database and use it in both QGIS and ArcGIS Pro.
Why PostGIS?
If, up until this point in time you have only used flat-files to store your spatial data, such as shapefiles, file geodatabases, or SpatiaLite databases you might not know what the use case would be for using software like PostGIS. In short, PostgreSQL (or postgres, for short) is a database server, meaning it is a program that accepts connections from one or more clients, and allows them to interact with the data the server manages. PostGIS is an extension that is installed on top of PostgreSQL and gives the database server the means to store and manipulate spatial data, as well as perform spatial calculations and analysis. PostGIS can perform spatial operations on both vector and raster data.
A more comprehensive comparison of PostGIS vs flat-file databases can be found here.
Why Docker?
Docker is a beast, it can be a bit intimidating for new users who aren’t familiar with the command-line, but it provides you with a means to build and run software in a very consistent and controlled way by building upon a technology called LXC containers.
What does that mean for the average GIS’er? It means that you can download and run software like Postgres + PostGIS on any machine with minimal configuration very quickly. For anyone who has tried to install Postgres + PostGIS on Windows before that’s kind of a big deal, because it can be a giant pain in the ass. That’s not to say that using Docker can’t be frustrating, but I’ve found it to be very quick and intuitive once I got the hang of it.
Install Docker Toolbox
Now, I wish this step could be as easy as saying “go here and download installer X”, but unfortunately it’s not that simple. Docker, being an enterprise-grade containerization software has many different versions you can install, depending on your host operating system.
Docker for Windows requires Windows 10 with Hyper-V virtualization enabled, which is only available on Windows 10 Professional or Enterprise 64 bit versions. I will not be using this software in this tutorial, and can’t confirm that the steps will be the same, although the will most likely be very similar.
Docker Toolbox is available for other versions of Windows as well as Mac, and is the version I will be using for this tutorial. It uses VirtualBox to run your containers in conjunction with Docker.
After you have downloaded and installed Docker Toolbox, you should now be able to launch the Docker Quickstart Terminal from the Windows start menu.
Running a Docker Container

When you installed Docker Toolbox, it installed and configured a Linux virtual machine on VirtualBox, where your containers will actually run. Lets test out our installation by running a container running the NGINX web server. This will not only prove that our container is running, but that we can access it through the network abstrations created by VirtualBox and Docker.
In the terminal, type the following command:
docker run --name=nginx -d -p 80:80 nginx
Lets disect this command bit by bit:
docker runis the command to tell Docker you want to run a container. There are loads of other commands, simply typedockerto see them all. We’ll cover some other commands shortly.--name=nginxSpecifies the name of the container we’re about to create. When working with Docker you can refer to a container either by its name, or its ID, which is a random alpha-numeric string. If you don’t specify a name, it will be generated out of two randomly selected words separated by an underscore.-dtells Docker to run this container in a detached state (i.e. in the background)-p 80:80tells Docker to map the host’s port 80 to the containers port 80. This is important, as containers will not automatically expose their ports to the outside. As we’re running a web server, which serves HTTP requests over port 80, this command allows requests from outside the container to reach the web server. We’ll expose a port in a similar way when we run our PostgreSQL database later.nginxis the container we would like to run. Docker includes the ability to pull containers from Docker Hub, which is a site with a collection of official and user-generated containers that are ready to use.
After you’ve ran the command you should get an output similar to this:
$ docker run --name=nginx -d -p 80:80 nginx
Unable to find image 'nginx:latest' locally
latest: Pulling from library/nginx
bc95e04b23c0: Pull complete
aee0c172e58a: Pull complete
c2a5d8ccfabc: Pull complete
Digest: sha256:adea4f68096fded167603ba6663ed615a80e090da68eb3c9e2508c15c8368401
Status: Downloaded newer image for nginx:latest
1743234776d03e8a39cd851324e68f93919d0ba13672d6a7d60b80c4558ee90f
Docker downloads the necessary images in order to run the NGINX container, then creates a new container called nginx. The last line is the container ID. As mentioned in the welcome text when you started the terminal, the containers will be running on a VM with a specific IP address, in my case it is 192.168.99.100 (yours may be different, it might be worthwhile to check).
Another way to get the IP address of your Docker VM is to run the command:
docker-machine ip
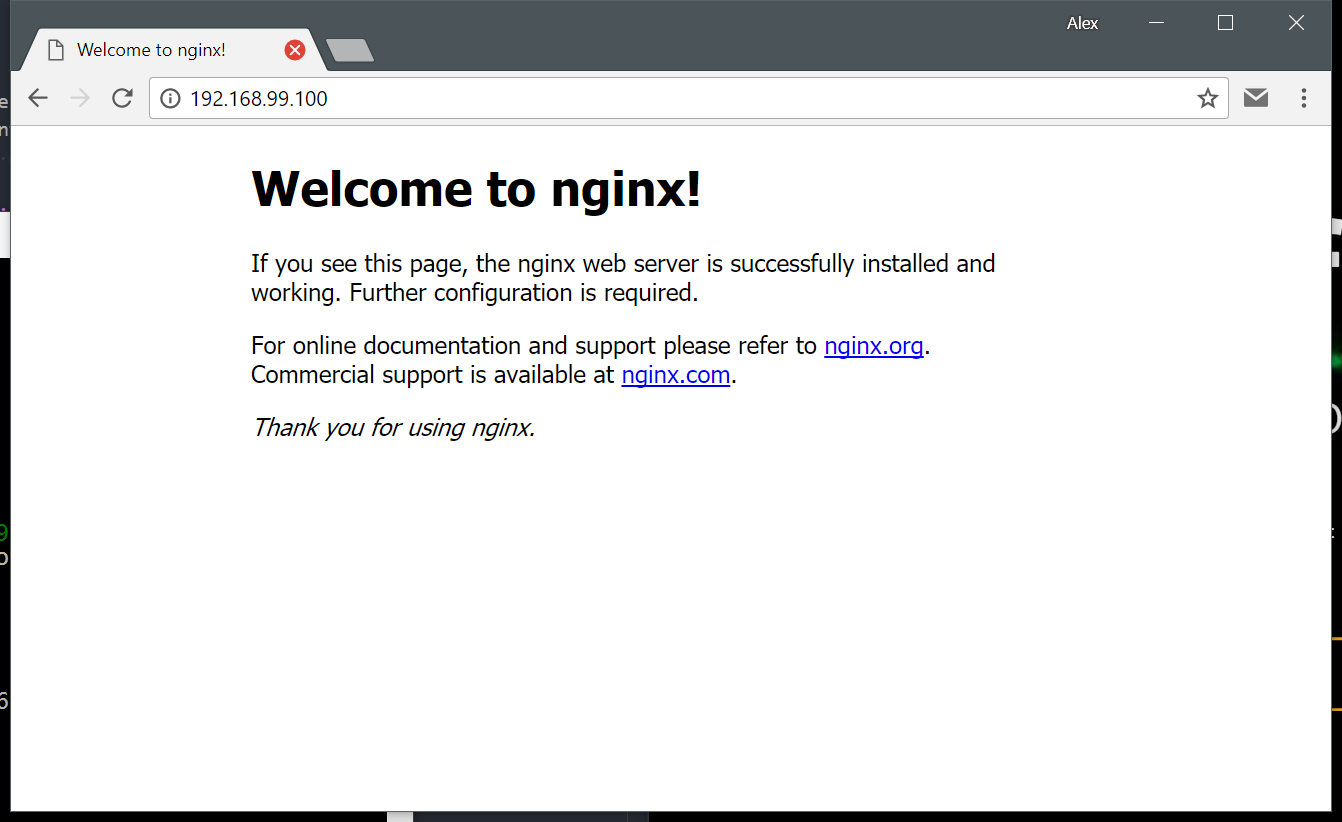
In your web browser, navigate to the IP address of your Docker VM. You should see the NGINX welcome screen, which demonstrates that the container is running and serving requests on the port we exposed.
Listing running containers
With Docker you can have many containers running at the same time. To list them you can use the command docker ps. It should output something similar to this:
$ docker ps
CONTAINER ID        IMAGE               COMMAND                  CREATED             STATUS              PORTS                NAMES
99fa53dffb90        nginx               "nginx -g 'daemon ..."   5 minutes ago       Up 2 minutes        0.0.0.0:80->80/tcp   nginx
Stopping & Deleting The Container
To stop and remove the NGINX container you use the docker stop and docker rm command. Containers must be stopped before they can be removed.
Run the command:
$ docker stop nginx
It will then print the name of the container that was stopped. Next, if you run docker ps again you will see that the nginx container is no longer running. If you’d like to list all containers, including the ones that have stopped, you can run the command docker ps -a to include stopped containers. It should output something similar to the following. Note the STATUS field to see when the container exited:
$ docker ps -a
CONTAINER ID        IMAGE               COMMAND                  CREATED             STATUS                          PORTS               NAMES
99fa53dffb90        nginx               "nginx -g 'daemon ..."   9 minutes ago       Exited (0) About a minute ago                       nginx
Lastly, you can delete the stopped container by using the docker rm command. It will print the name of the container after it has been deleted.
docker rm nginx
Running PostGIS
Congratulations! You’ve ran and managed your first Docker container! The next step is to get our spatial database running.
One of the advantages of Docker I mentioned before is the ability to leverage both official and community built containers to get your software running quickly no matter what machine you’re running it on. If you look through Docker Hub there are a few PostGIS containers available for you to use. For this example I will be using the Dockerfile (a set of instructions used to create a finished container) provided by the kartoza/postgis repository.
Persisting Your Data
Before we create the database we need to think about how our database info will be stored within Docker. Normally when you create a Docker container, you are not meant to be able to enter the containers filesystem to copy or modify data. This means that unless we specify what’s called a volume in Docker, our database data will be saved inside the container, making it difficult or impossible to perform backups or upgrades to the database software without losing all your data.
What we’re going to do is create a volume container that will be used to persist PostgreSQL database files outside of the the container that runs the database process:
docker volume create pg_data
If you wish to read more about using volumes with Docker you can read the documentation here.
Creating the Database Container
Next we’ll use docker run to create the PostGIS container:
docker run --name=postgis -d -e POSTGRES_USER=alex -e POSTGRES_PASS=password -e POSTGRES_DBNAME=gis -e ALLOW_IP_RANGE=0.0.0.0/0 -p 5432:5432 -v pg_data:/var/lib/postgresql --restart=always kartoza/postgis:9.6-2.4
Lets break down this command part-by-part. More examples of how you can run this container can be found on Docker Hub
docker run --name=postgistells Docker our new container will be namedpostgis-drun the container in the background (detached mode)-e POSTGRES_USER=alexthe-eflag sets an environment variable inside the container. This one is used to configure name of a login role in PostgreSQL that will have superuser (admin) priviliges in the database. You can rename this to whatever you want.-e POSTGRES_PASS=passwordsets an environment variable that will set the password of the login role to `password. You can set this to whatever you want.-e POSTGRES_DBNAME=gismuch like you can guess, the environment variable tells the container to create a new database on the server with the namegis. After the database is created then the PostGIS extension will be enabled on it.-e ALLOW_IP_RANGE=0.0.0.0/0tells the container to configure PostgreSQL to accept connections from anyone. If you did not set this then the database would only accept connections from addresses using the Docker networking subnet.-p 5432:5432maps the port 5432 on the host VM to port 5432 on the container. This is required because the database server listens for connections on port 5432 by default.-v pg_data:/var/lib/postgresqltells the container filesystem to mount thepg_datavolume we just created to the path/var/lib/postgresql. This means that any data that the container saves or creates in that directory will instead be saved in thepg_datavolume.--restart=alwayscreates a restart policy for your container. Now your container will start every time the Docker virtual machine starts. If this was not set, you would have to manually start the container every time the VM booted up withdocker start postgiskartoza/postgis:9.6-2.4tells Docker to pull thekartoza/postgisrepository from Docker Hub, using PostgreSQL version 9.6 and PostGIS version 2.4. You can see other versions that are available on Docker Hub
That command is definitely a mouthful. Once the images have downloaded you should then see that the container has started by using docker ps:
CONTAINER ID        IMAGE                      COMMAND                  CREATED             STATUS              PORTS                    NAMES
748ba3fabd31        kartoza/postgis:9.6-2.4   "/bin/sh -c /start..."   About an hour ago   Up About an hour    0.0.0.0:5432->5432/tcp   postgis
If you want to see log output from your container you can do so by using docker logs
$ docker logs postgis

PostgreSQL stand-alone backend 9.6.5
2017-10-29 19:10:41.256 UTC [24] LOG:  could not bind IPv6 socket: Cannot assign requested address
2017-10-29 19:10:41.256 UTC [24] HINT:  Is another postmaster already running on port 5432? If not, wait a few seconds and retry.
2017-10-29 19:10:41.256 UTC [24] WARNING:  could not create listen socket for "::1"
backend> backend> postgres ready
2017-10-29 19:10:41.277 UTC [27] LOG:  database system was shut down at 2017-10-29 19:10:41 UTC
2017-10-29 19:10:41.278 UTC [28] [unknown]@[unknown] LOG:  incomplete startup packet
2017-10-29 19:10:41.279 UTC [27] LOG:  MultiXact member wraparound protections are now enabled
2017-10-29 19:10:41.285 UTC [24] LOG:  database system is ready to accept connections
2017-10-29 19:10:41.285 UTC [32] LOG:  autovacuum launcher started
Postgis is missing, installing now
Creating template postgis
Enabling template_postgis as a template
UPDATE 1
Loading postgis extension
CREATE EXTENSION
Enabling hstore in the template
CREATE EXTENSION
Enabling topology in the template
CREATE EXTENSION
                                 List of databases
       Name       |  Owner   | Encoding | Collate |  Ctype  |   Access privileges
------------------+----------+----------+---------+---------+-----------------------
 gis              | alex     | UTF8     | C.UTF-8 | C.UTF-8 |
 postgres         | postgres | UTF8     | C.UTF-8 | C.UTF-8 |
 template0        | postgres | UTF8     | C.UTF-8 | C.UTF-8 | =c/postgres          +
                  |          |          |         |         | postgres=CTc/postgres
 template1        | postgres | UTF8     | C.UTF-8 | C.UTF-8 | =c/postgres          +
                  |          |          |         |         | postgres=CTc/postgres
 template_postgis | postgres | UTF8     | C.UTF-8 | C.UTF-8 |
(5 rows)

2017-10-29 19:10:43.514 UTC [24] LOG:  received smart shutdown request
2017-10-29 19:10:43.514 UTC [32] LOG:  autovacuum launcher shutting down
2017-10-29 19:10:43.517 UTC [29] LOG:  shutting down
2017-10-29 19:10:43.524 UTC [24] LOG:  database system is shut down
Postgres initialisation process completed .... restarting in foreground
2017-10-29 19:10:43.564 UTC [126] LOG:  database system was shut down at 2017-10-29 19:10:43 UTC
2017-10-29 19:10:43.566 UTC [126] LOG:  MultiXact member wraparound protections are now enabled
2017-10-29 19:10:43.568 UTC [123] LOG:  database system is ready to accept connections
2017-10-29 19:10:43.568 UTC [130] LOG:  autovacuum launcher started
Connecting In QGIS
You should now be able to add the connection to PostGIS in the browser panel in QGIS. Right click the PostgreSQL icon and click “Create New Connection”, and enter the database connection parameters you used in the docker run command. The “Host” parameter will the the IP of your Docker VM (you can get it by running docker-machine ip in the terminal window)

Creating Or Importing Geometry
QGIS has a geo algorithm called “Import into PostGIS” that can load layers from various sources into your PostGIS database.
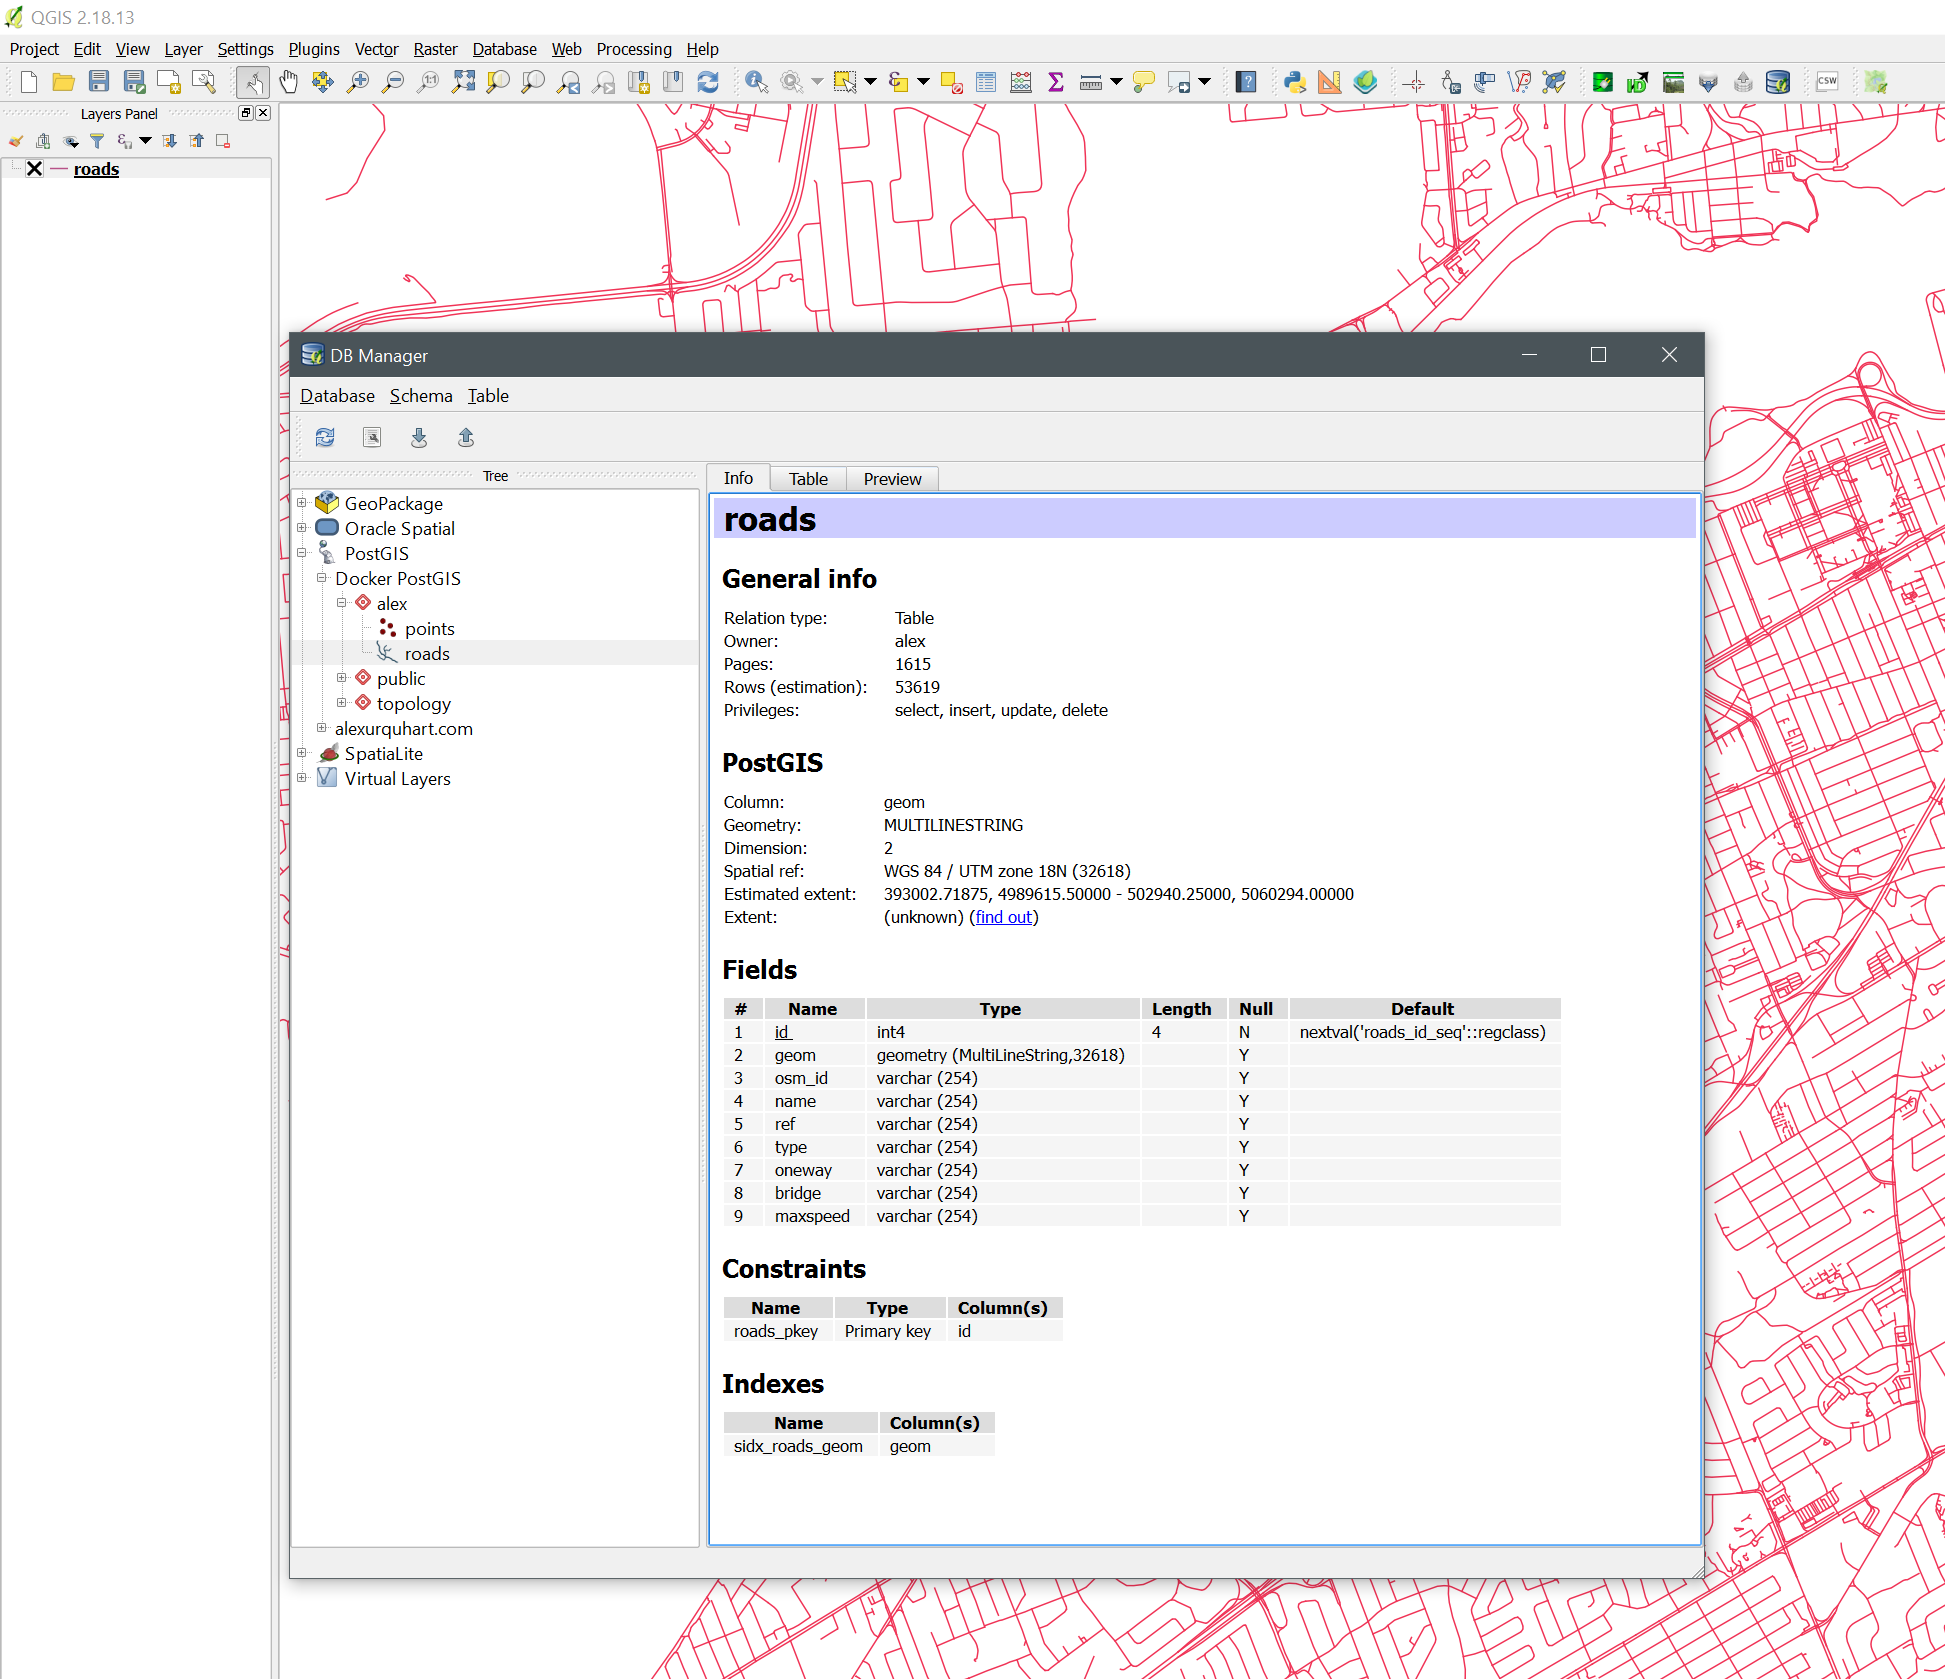
You can also use the DB Manager plugin to create new database schemas, as well as import and export files from the database. In the screenshot below I have loaded an extract from OpenStreetMap of roads in the Ottawa area.
Connecting In ArcGIS Pro
You can also perform visualization and analysis on your data in ArcGIS Desktop. There are, however, some limitations on what kinds of operations you can perform. During my limited testing using ArcGIS Pro 2.0 I was not able to perform feature editing, or data management tasks such as modifying tables (adding/dropping fields, etc). I was able to load and visualize the data, as well as run geoprocessing tools on the data. I was able to export the geometry to a file geodatabase, as well as delete entire tables. I think this is either a licensing issue, or I have to install some extra shared libraries into PostgreSQL in order to use the ST_Geometry type.
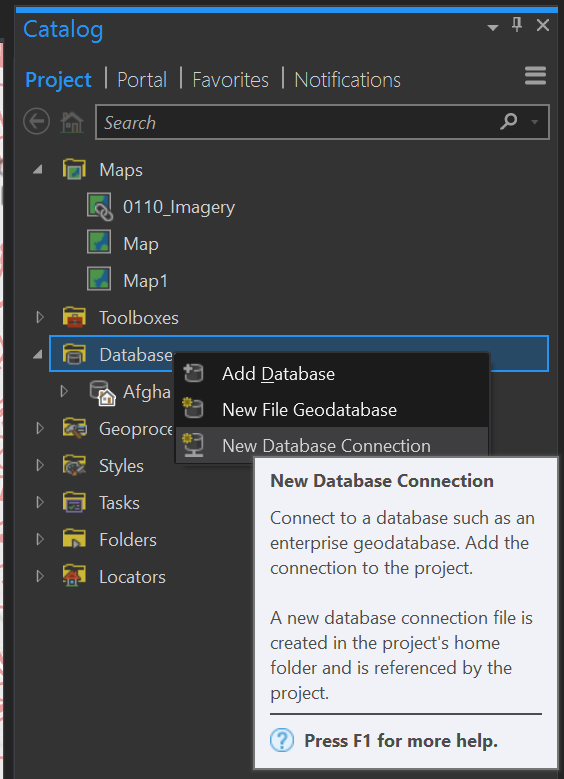
Creating A New Database Connection
Connecting to your database is as simple as adding a new database connection in either ArcCatalog, or in the Catalog pane in ArcGIS Pro. You can use the same credentials and connection information you used in the environment variables when you created the container. The “Host” parameter is set to the IP of your Docker VM (you can get it by running docker-machine ip in the terminal window, if you don’t have it).
Creating A New Schema
When I first tried to view the road data I had loaded into the database in ArcGIS Pro, I was unable to find it in the catalog pane. I later discovered this is because by default ArcGIS looks into a database schema with the same name as the currently connected database user. In my case the login name for PostgreSQL is alex, so ArcPro is looking for tables in the schema alex. Creating a new schema is easyily accomplished using the DB Manager plugin in QGIS, however if you don’t have QGIS installed on your machine you can run a SQL query using Docker to create it.
To create a new schema in your PostGIS database, run the following command in the quickstart terminal. Make sure to replace the <PASSWORD>, <DBNAME> and <USERNAME> parameters with the ones you used when you created the container.
docker exec -it postgis /bin/bash -c "PGPASSWORD=<PASSWORD> psql -d <DBNAME> -U <USERNAME> -h localhost -c \"create schema <USERNAME>;\""
What this command does is execute a command inside the postgis container. In this case, it is executing a SQL command using psql, a command-line PostgreSQL client that will create the schema you need.
Viewing Data
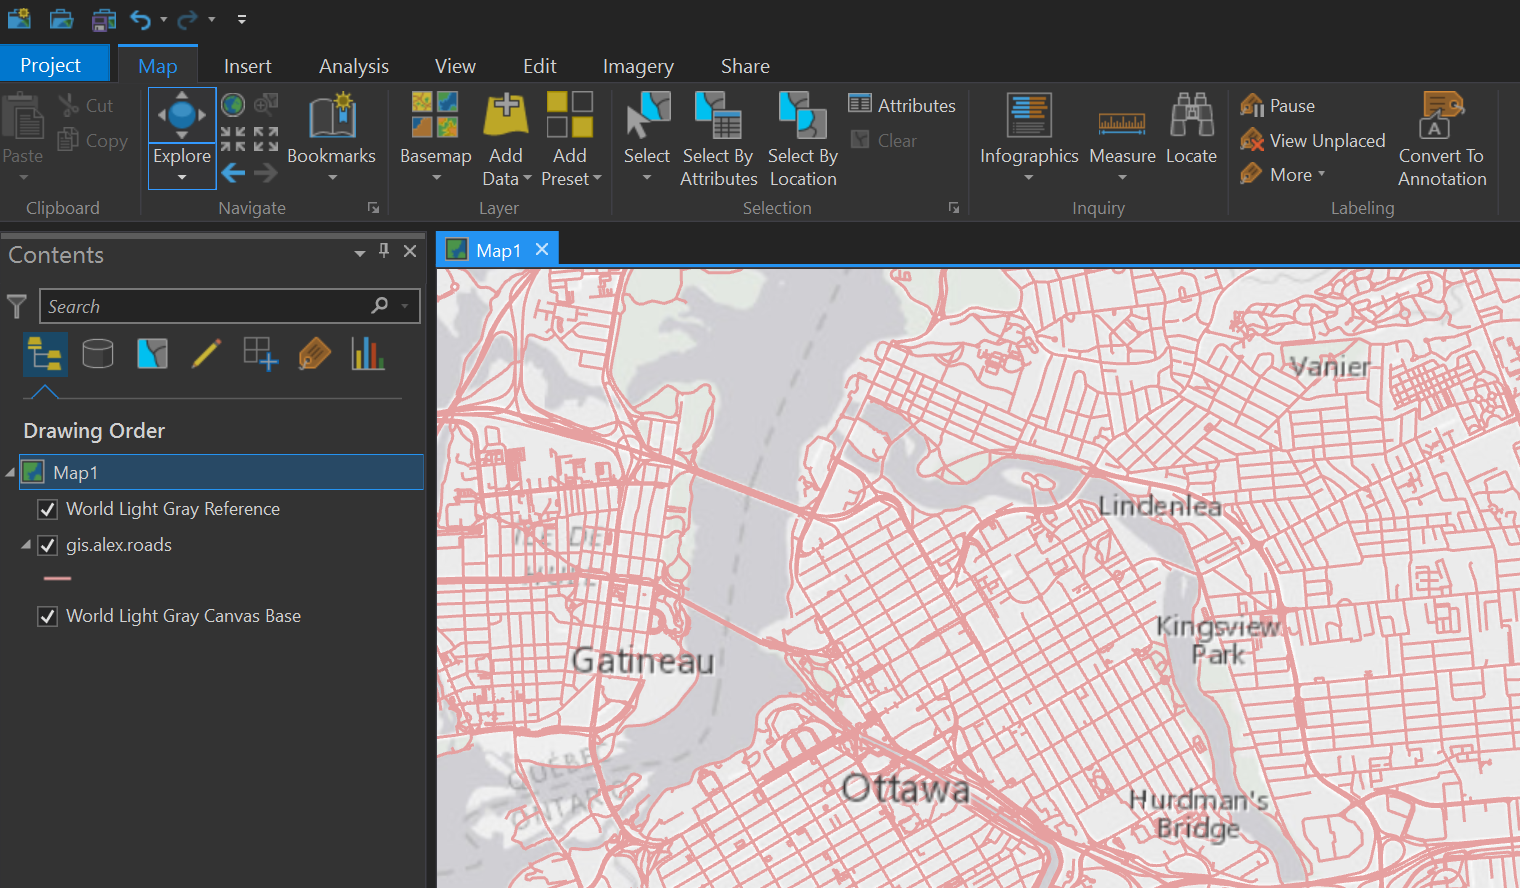
In this state utilizing ArcGIS with PostGIS is kind of a chicken and the egg type of situation, as I was not able to create new data in the database, although I was able to view and analyze already existing data. After the new schema was created, and a roads shapefile was imported into that schema using QGIS, I was then able to successfully bring the data in and view it in ArcGIS Pro
Conclusion
In this over-arching tutorial we went over the basics of how to use a spatial database server, and how to deploy one using Docker. There’s a lot more you can accomplish using container-based software in your projects, and I hope to write about them later. Some things I have been experimenting with is deploying Geoserver alongside PostGIS using Docker. I’m also interested in exploring if there’s an easy way to gain more functionality on the Esri side of the house, as well as seeing if I can get volume mount-points outside of the VirtualBox VM and into the host OS.