Table of Contents
Web AppBuilder for ArcGIS is a browser-based tool that enables end-users to create interactive mapping applications using their own data. The Developer Edition of Web AppBuilder provides a framework for developers to create custom themes and widgets for Web AppBuilder using the Dojo Toolkit and the ArcGIS API for JavaScript.
Anybody who has worked with the Dojo toolkit for any length of time knows that creating custom Dojo widgets is a less than pleasant experience. On top of the sheer length of the code required to get a simple widget on the screen, you have to deal with cryptic error messages, and an HTML structure that one of Esri’s presenters at the 2015 Developers Summit lovingly referred to as “DOM Vomit”
Luckily there are options available for developers who want to work on Esri’s stack using modern tools such as React + Redux, and ES6 code transpiling using Babel. This article will walk you thorugh setting up a separate widget development environment outside of Web AppBuilder, how to install the build tools and boilerplate React widgets, and how to export those widgets back to Web AppBuilder for use in your future applications. You can view a basic demonstration of the final product here.
Setting Up
We are going to start by assuming that you have your own ArcGIS Online organization or a Portal instance, with a functioning version of Web AppBuilder. If you don’t have that yet, you may be happy to hear that ArcGIS developer accounts now have a free tier, that includes a single named user on your own private organization, and 50 free credits per month. Now anybody can download and utilize Web Appbuilder without having a pricey subscription to ArcGIS or the EDN.
You will need to to export or download one of your applications and save it somewhere outside of Web AppBuilder so we can install our development dependencies. A very basic app with no operational layers, and minimal extra widgets would be fine to use.

Once you’ve downloaded your web application then you should extract it to a separate directory outside of Web Appbuilder.
Now what we need to do is download the arcgis-wab-react-redux git repository created by ArcData.cz, an Esri distributor
located in Prague. This is a boilerplate starter kit for React widget development, and will include everything
you’ll need to get started.
After you take a look at the repository you can either download it from GitHub or clone it using Git:
$ git clone https://github.com/arcdata/arcgis-wab-react-redux.git
After this you are going to merge the contents of the arcgis-wab-react-redux repository into your downloaded
Web AppBuilder application, opting to replace or overwrite files when copying.
Next we’ll have to install all the Node dependencies with npm. From the command line run:
$ npm install
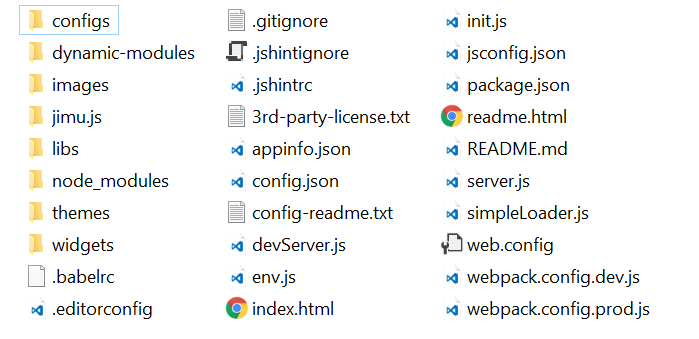
Your application directory should look like the example below:
Including The Example Widgets
Inside your application’s config.json, you’ll need to manually reference the widget you’ll be developing.
In this one I’m going to replace my “Layer List” widget with the “React Geosearch” widget included in the
repository.
  ...
    "widgets": [
      {
        "uri": "widgets/ReactGeosearch/Widget",
        "version": "2.3",
        "id": "widgets_Geosearch_Widget_18",
        "name": "ReactGeoSearch",
        "index": 1
      },
      ...
Starting The Dev Server
The npm packages you installed included webpack dev server, and the configuration included will save you time by recompiling your JavaScript every time you save your code, as well as reloading your widget automatically using React Hot Loader, meaning you’ll rarely have to refresh the page when developing widgets.
You can start the development server by running npm start in the command line, then navigate
to http://localhost:3000
A Note About HTTPS
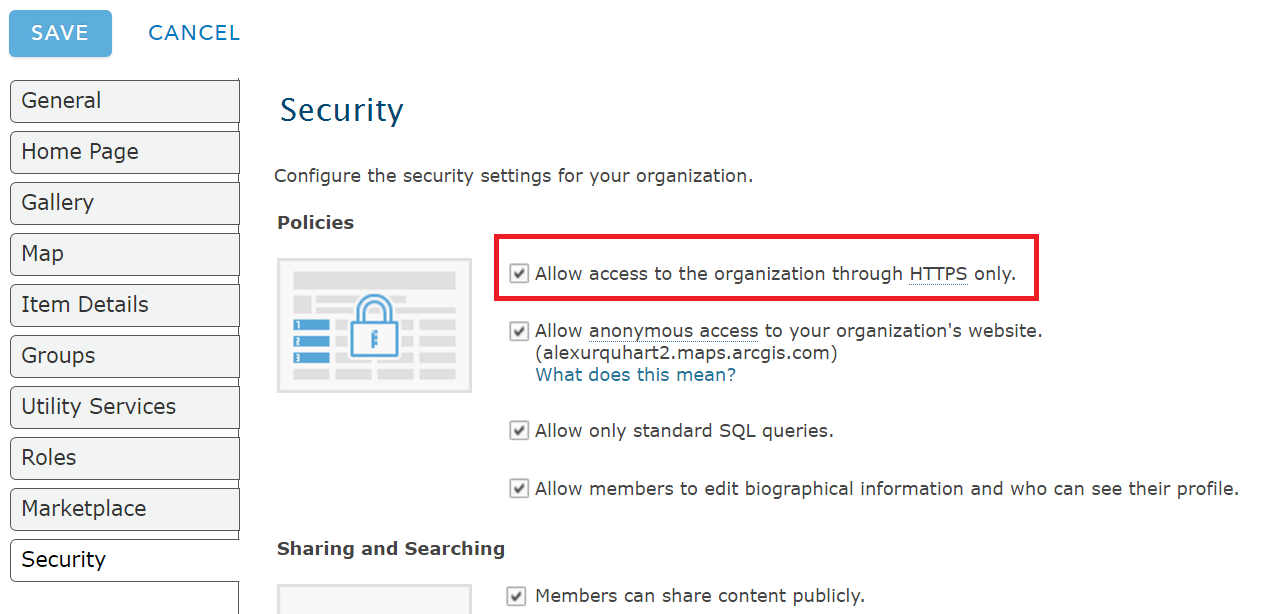
If your ArcGIS online organization or Portal instance has opted to only allow access via HTTPS then there is a chance your application will not be able to load. Disabling that option in your organization settings will fix the issue, or you can make one small change to the dev server configuration and use webpack dev server’s included self-signed certificate to use HTTPS locally.
In your application folder open devServer.js and add the attribute https: true to serverOptions, like so:
var serverOptions = {
  https: true,
  contentBase: './',
  hot: true,
  historyApiFallback: true,
  quiet: false,
  noInfo: false,
  lazy: false,
  publicPath: config.output.publicPath,
  headers: { 'Access-Control-Allow-Origin': '*' },
  stats: { colors: true }
};
After that’s done then you can browse to https://localhost:3000 to view your app.
Voila!
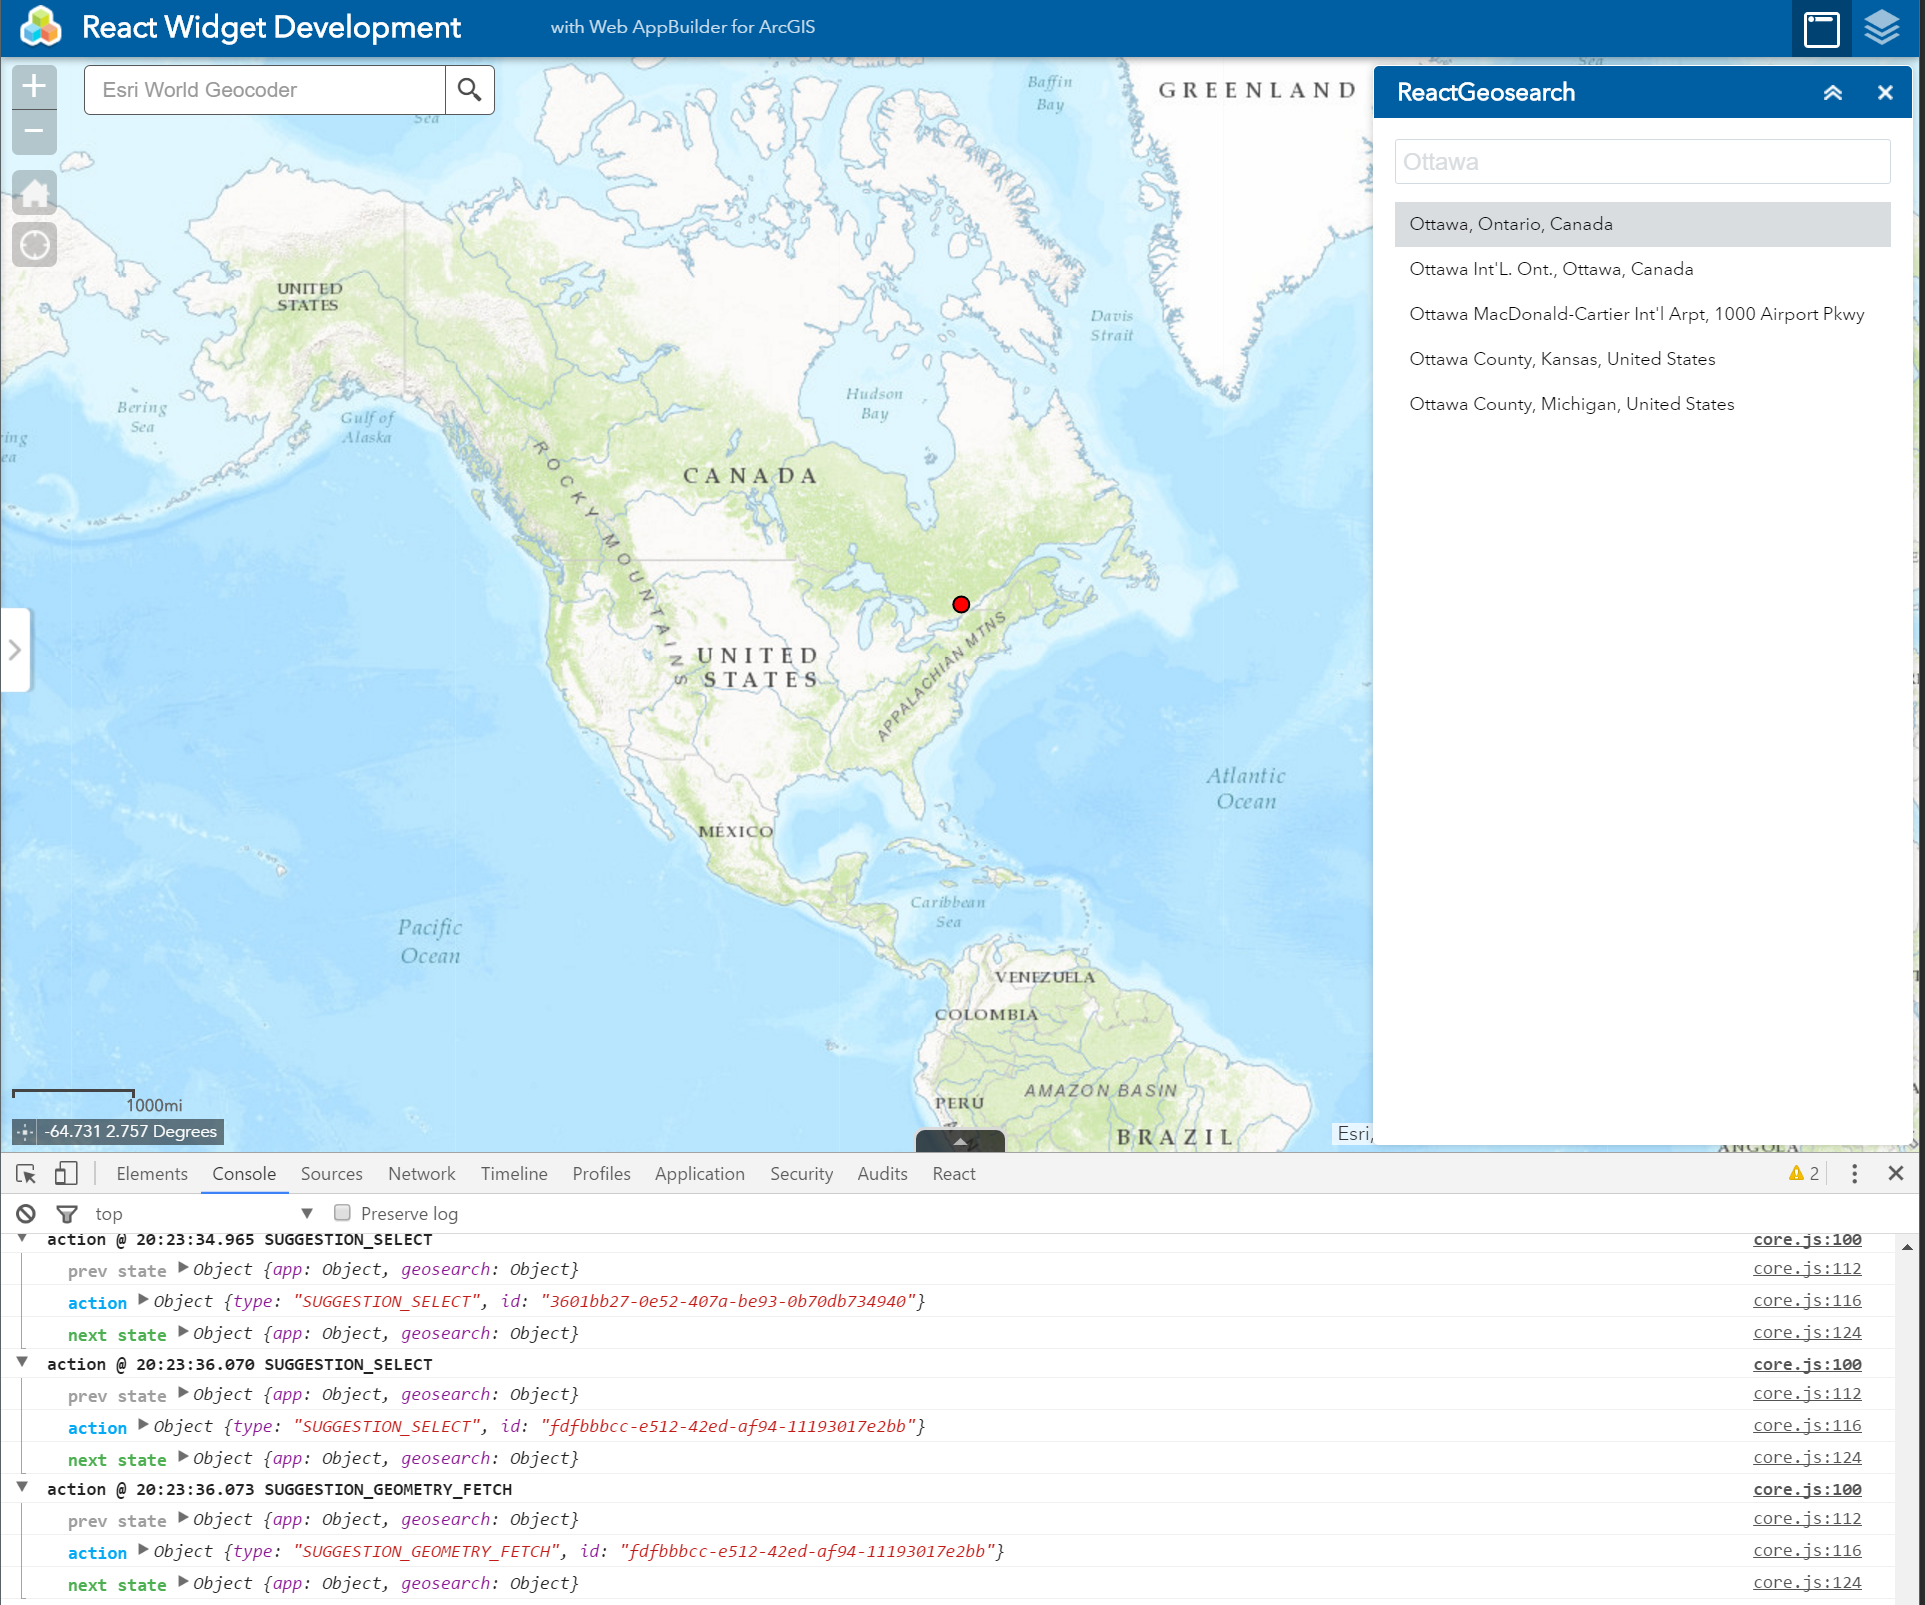
If you followed the steps correctly you should see the Geosearch widget available in your app. If you open developer tools in your browser you’ll also be able to see formatted logs from Redux when you change the application state.
Deploying Widgets Back To Web AppBuilder
Once you have completed your widget you can run npm run build inside your application folder to
generate packed and minified JS files and sourcemaps, ready to be used in production.
All dependencies specified in package.json will be loaded by webpack and compiled into libs/vendors.js.
To copy your production ready widget back to Web AppBuilder complete the following:
From your exported widget development app, copy your constructed ES6 widget folders (in this case ReactGeosearch)
over to WebAppBuilderForArcGIS/client/stemapp/widgets. You can delete the src/ folder once it’s copied.
Next, from your exported widget development app, copy the following files to WebAppBuilderForArcGIS/client/stemapp/libs:
- libs/main.js
- libs/vendors.js
- libs/vendors.js.map
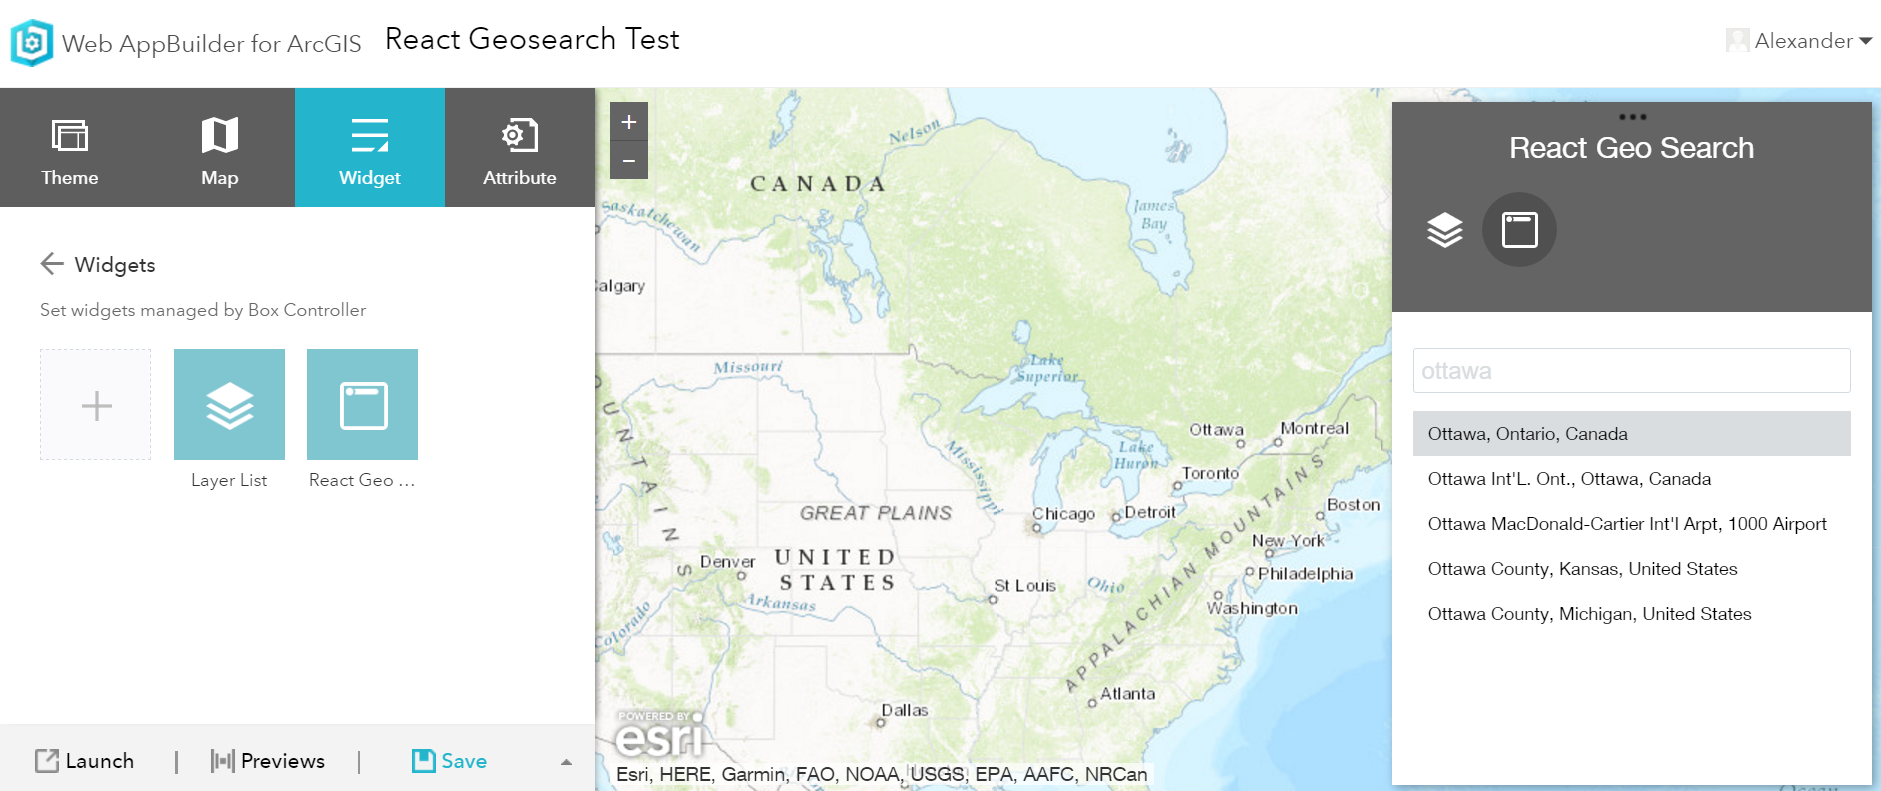
Now, if you load up Web AppBuilder you should be able to add these custom widgets just like any other!
Some Caveats
I haven’t thought about the issues this could create beyond what it means for experimentation and hobby projects,
but I believe there will be a few factors that will limit the number of use cases for using this particular build system
within Web AppBuilder. If developers start mixing and matching different widgets with different additional dependencies
from npm then they will need to compile a new vendors.js that can satisfy the dependencies for all the widgets.
Also, if you create an application that doesn’t include a React widget, then you’ll either have to manually
edit main.js in stemapp/libs to stop from loading the vendors file, unless you want your
clients downloading it. On my machine vendors.js clocked in at a hefty 422 Kb, which is a serious
factor to consider if you’ll be targeting mobile users or people with a slow connection speed.
Where To Go From Here
I’ve uploaded a sample app here with both the react widget template, and the geosearch widget if you’d like to see what the final result looks like. I’m interested in hearing what other people’s opinions are on the approach used here, and whether the increase in download size in order to load the vendor file is worth it or not. Leave your thoughts in the comments!
